
Canvas Editor
The wireframe editing canvas is where you design and refine your screens. The left sidebar contains all the drawing and selection tools, the center is the canvas where you place and arrange elements, and the right sidebar shows the properties of the selected element.
Tools
Select
Click to select and move elements on the canvas. Selected elements show their properties in the right sidebar.
Square
Draw rectangular container elements on the canvas.
Circle
Draw circular elements on the canvas.
Text
Add text labels and content blocks.
Image
Place image placeholder elements.
Button
Add interactive button elements.
Input
Add form input fields.
+ (Add Screen)
Add a new screen to the wireframe project.
Locked Elements
AI-generated screens come locked by default — elements cannot be moved or resized until unlocked. Press Ctrl + D to unlock all elements on the current screen, giving you full control to rearrange and edit them.
Storyboard Mode
Storyboard mode lets you see all your frames and their connection points in a bird’s-eye view. Toggle between the single-screen canvas and storyboard mode using the same button in the left sidebar. In storyboard mode, each screen is shown as a card with a preview of its layout.
Storyboard Features
Frame Overview
See all screens at a glance with their element counts and visual previews.
Set Modal
Mark any screen as a modal overlay instead of a full page.
Click to Edit
Click any frame card to jump into its canvas view for detailed editing.
Zoom Controls
Use the zoom controls on the left to zoom in/out of the storyboard.
Flow Connections
Visualize how screens are connected through flow actions between frames.
Element Properties
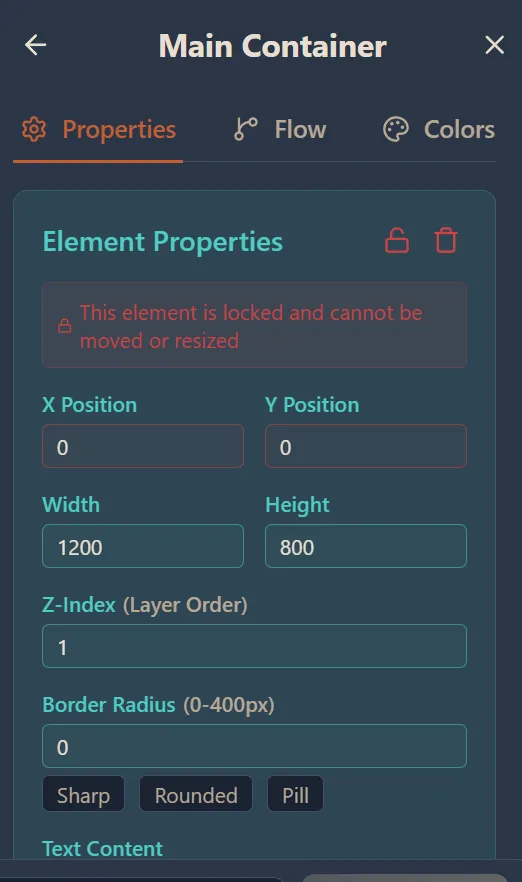
Double-click any element on the canvas to enter it and open its property panel in the right sidebar. The panel has three tabs: Properties, Flow, and Colors. From here you can edit position, size, styling, and behavior for each element.
Properties Tab
Position (X, Y)
Set the exact pixel position of the element on the canvas.
Size (Width, Height)
Set the element\u2019s dimensions in pixels.
Z-Index (Layer Order)
Control which elements appear on top of others.
Border Radius
Set corner rounding with a numeric value or use the Sharp, Rounded, or Pill presets.
Text Content
Edit the text displayed inside the element.
Colors Tab
Customize background, border, and text colors for the selected element.
Flows
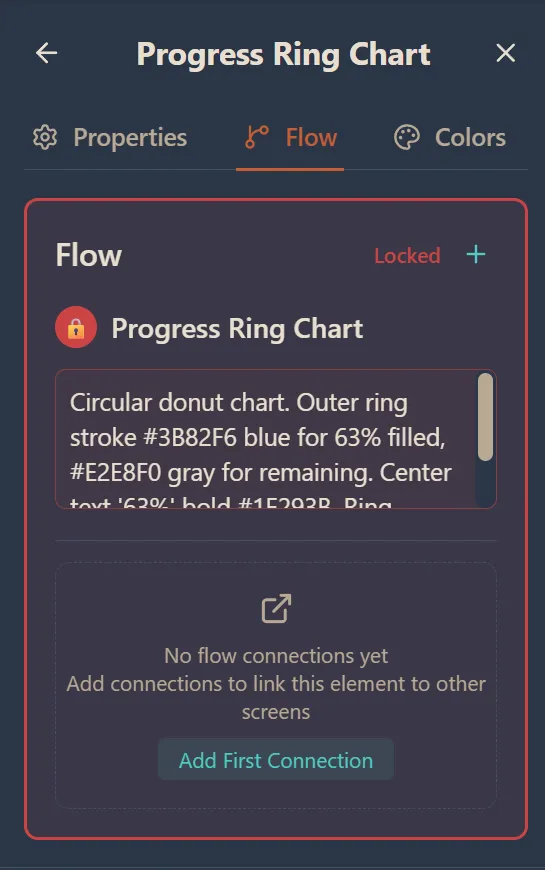
Flows define actions and navigation between screens. A flow is an action such as navigating to another page, opening a modal, or routing to a different area. Small link icons on the canvas indicate which elements have flows attached. Frames are automatically linked between each other during AI generation, and flow connections are created as well.
Setting Up Flows
Select an Element
Click the element you want to add a flow to.
Open Flow Tab
In the right sidebar, switch to the Flow tab to see existing connections or add new ones.
Add Connection
Click Add First Connection (or the + button) to create a new flow. Choose a target screen or frame to link to.
View on Canvas
Connected elements show a small link icon on the canvas to indicate they have flow actions.
Block Connections
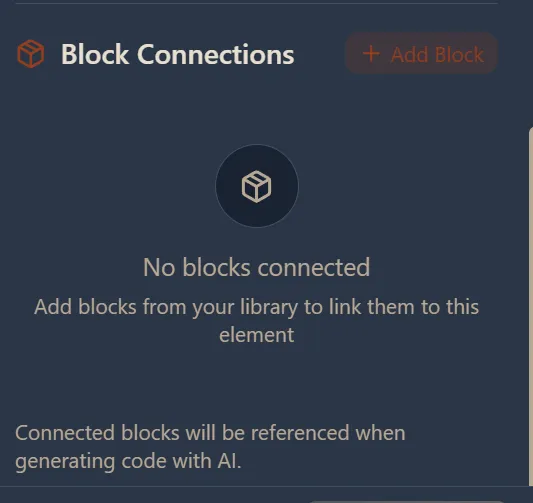
Block Connections let you attach blocks from the Block Library directly to wireframe elements. When you double-click an element and scroll down in the properties panel, you’ll find the Block Connections section. Click + Add Block to link a block (HTML, component, or template) to the element. Connected blocks are referenced when generating code with AI, making it easy to attach specific HTML or component code to wireframe elements.
AI Editing
The AI prompt bar at the bottom of the canvas lets you use AI to edit or create screens. Select your AI model from the dropdown on the left, describe the changes you want, and the AI will modify the wireframe for you. You can also use voice input or the CLI Edit button for advanced editing.
Context-Aware Prompting
Single Screen
When editing a single screen, the prompt bar shows "Editing 'Screen Name'" and AI changes apply only to that screen.
Storyboard
When in storyboard mode, AI can edit all frames at once or build new frames using the existing ones as reference.
Voice Input
Use the microphone icon in the prompt bar to dictate your instructions instead of typing.
CLI Edit
Click CLI Edit for an advanced editing mode with more control over the AI-powered changes.
Export & Integration
Wireframes can be exported, imported, or directly used when creating projects or within the Project Hub itself. This makes it easy to go from wireframe design to a working project without manually recreating layouts.