
एजेंटिक एजेंट
अवलोकन
The Agentic Agents section is the core AI workspace within your project. It allows you to create and manage agent tabs — whether they are CLI-based, SDK-based, or ACP-based. Each tab runs an independent AI agent session, so you can work with multiple agents or conversations simultaneously.
Kaiju Hub AI Anthropic Claude Code, Google Gemini, और OpenAI Codex के लिए बिल्ट-इन सपोर्ट के साथ आता है। Pro संस्करण OpenCode जैसे कस्टम CLI जोड़ने का भी समर्थन करता है।
डिफ़ॉल्ट रूप से खुलने वाला एजेंट प्रोजेक्ट जानकारी क्षेत्र में आपके द्वारा चुने गए प्रदाता और मोड द्वारा निर्धारित होता है। हर बार जब आप + बटन पर लेफ्ट-क्लिक करते हैं, तो उस डिफ़ॉल्ट कॉन्फ़िगरेशन का उपयोग करके एक नया टैब खुलता है।
Kaiju Hub AI संदर्भ प्रणाली
यह कैसे काम करता है
Kaiju Hub AI uses a unique context bundling system to communicate with AI agents. Instead of sending raw messages directly, every prompt you send is bundled into a structured context file that the AI reads as a single package. This bundle includes your prompt text, any attached images, attached files, and references to blocks or projects you have included.
When you send a message, Kaiju Hub AI assembles all of these pieces into one bundle file and passes it to the AI agent. The agent reads the entire bundle at once, giving it full access to everything you have attached in a single, organized context.
क्या बंडल किया जाता है
प्रॉम्प्ट टेक्स्ट
Il tuo messaggio all'agente IA e incluso come istruzione principale.
संलग्न चित्र
Any images you attach are included in the bundle. You are not restricted to a small number — you can send many images in a single message.
संलग्न फ़ाइलें
Files you attach are bundled so the AI can read and reference their contents directly.
प्रोजेक्ट संदर्भ
If you attach a project from the Project Hub, its path is included so the AI can reference and work with that project directly.
ब्लॉक संदर्भ
Blocks from the Block Library can be attached to a message. The AI will read and utilize the block content as part of its context.
क्रॉस-सत्र मेमोरी
Every bundle is stored on the backend after it is sent. This means the AI can reference context from previous tabs within the same session, and it can also look back at previous chat sessions entirely. For example, if you had a conversation last week about a specific feature, the AI can recall what you discussed and what you asked for.
This cross-session memory works across all tabs. If you send something in one tab, the context is available for the AI to reference from any other tab or future session.
यह क्यों मायने रखता है
कम टोकन उपयोग
By bundling context into a structured file rather than appending raw history, the system cuts down on token consumption significantly.
अधिक संदर्भ सामग्री
You can include far more context — many images, multiple files, project references, and blocks — without hitting typical limitations.
स्थायी इतिहास
The AI retains awareness of past conversations across sessions, so you do not need to repeat yourself or re-explain prior work.
टैब जोड़ें
अवलोकन
एजेंट टूलबार में + बटन आपको नए एजेंट टैब बनाने की अनुमति देता है। + बटन पर लेफ्ट-क्लिक करने से प्रोजेक्ट जानकारी क्षेत्र में चयनित डिफ़ॉल्ट एजेंट का उपयोग करके तुरंत एक नया टैब खुलता है। + बटन पर राइट-क्लिक करने से एक ड्रॉपडाउन मेनू खुलता है जहां आप एक विशिष्ट एजेंट प्रकार चुन सकते हैं।
समर्थित एजेंट प्रकार
Markdown व्यूअर
अवलोकन
The Markdown Viewer tab renders markdown content within the agent area. It is used to display formatted documentation, agent instructions, skill files, and other markdown-based content directly in the workspace without switching to an external editor.
सुविधाएँ
रिच रेंडरिंग
Supports full markdown syntax including headings, lists, code blocks with syntax highlighting, tables, links, and images.
एजेंट दस्तावेज़ीकरण
Visualizza i file di istruzioni degli agenti (CLAUDE.md, agents/*.md, skills/*/SKILL.md) resi in un formato leggibile.
इनलाइन प्रदर्शन
Content renders inline within the agent tab area, so you can read documentation alongside your active agent sessions.
एजेंट क्षेत्र
अवलोकन
The Agent Area is the main workspace for interacting with AI agents. It displays chat messages, renders code with syntax highlighting, shows file and component context, and provides controls for managing the conversation. Each agent tab has its own independent agent area.
टैब कंपोनेंट
कोड टर्मिनल टैब
For CLI-based agents (Claude Code, Gemini CLI, Codex CLI). Shows a terminal-like interface where the agent executes commands and displays output in real-time.
SDK चैट टैब
For SDK-based agents (Claude SDK, Gemini SDK, OpenAI SDK). Provides a conversational chat interface for interacting with the agent.
ACP चैट टैब
For ACP (Agent Communication Protocol) agents. A specialized chat interface for communicating with dynamic protocol-based agents.
एजेंट और स्किल टैब
Browse and manage agent capabilities, custom agents, and skill definitions for the current project.
सत्र इतिहास पैनल
View a log of all past sessions for the current agent type, with the ability to load and review previous conversations.
इमेज गैलरी
Sfoglia le immagini generate dagli agenti IA durante la sessione del progetto corrente.
संदर्भ इतिहास
अवलोकन
The Context History panel tracks all context that has been shared with AI agents throughout your project. It separates context into internal and external sources, giving you full visibility into what information agents have accessed.
संदर्भ प्रकार
आंतरिक संदर्भ
Context generated from within your project — selected files, checked code, component selections, and file content that you explicitly provided to agents during chat sessions.
बाहरी संदर्भ
Context from outside your project — web search results, fetched URLs, imported documentation, or other external data sources that agents referenced or that you attached.
सुविधाएँ
कालानुक्रमिक लॉग
Context entries are listed in chronological order so you can trace what was shared and when.
फ़ाइल रजिस्ट्री
An internal file registry tracks all files that have been shared with agents, including enhanced metadata and unique IDs for each file.
संदर्भ संकेतक
The chat input area shows a context indicator displaying the number of files currently attached, so you always know what context is active.
संदर्भ मॉडल
Click the context indicator to open a detailed modal showing all current context — files, components, and projects — with options to add or remove items.
आंतरिक और बाहरी
अवलोकन
The Internal / External toggle in the agent toolbar controls how CLI-based agents, including custom agents, are launched. This determines whether the agent runs inside the built-in workspace terminal or in a separate external terminal window on your system.
मोड
आंतरिक
The agent runs inside the built-in workspace terminal. Output is displayed inline within the agent area, and the session is fully managed by Kaiju Hub AI.
बाहरी
The agent launches in a separate system terminal window (e.g. PowerShell, Terminal, iTerm). Useful when you need a full terminal environment or want to run agents alongside other command-line tools.
शेल चयनकर्ता
When in External mode, a dropdown appears letting you choose which shell to use (e.g. PowerShell, Command Prompt, Git Bash). The selected shell is used when launching external CLI agent sessions.
उन्नत चैट इनपुट
अवलोकन
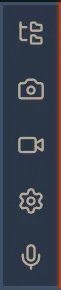
The Enhanced Chat Input is the main input area at the bottom of the agent workspace. It goes beyond a simple text box — offering image attachments, screen recording, file attachments, component selection, voice input, and granular permission controls for AI context.
अटैचमेंट बटन
गैलरी (इमेज संग्रह)
Opens the Image Upload Modal where you can browse, select, and upload images to include in your message. Supports multi-select with thumbnails and drag-and-drop upload.
इमेज पॉपअप मॉडल
Click any attached image thumbnail to open it in a full-size centered overlay viewer. Close with the X button or by clicking outside the modal.
स्क्रीन रिकॉर्डिंग
Capture screen recordings directly from the chat input. The recorder captures frames at configurable FPS (30 or 60), tracks frame count and duration, and generates a manifest with metadata. Recorded frames can be attached to messages for visual context.
फ़ाइल अटैचमेंट
Attach project files directly to your message using the paperclip icon.
कार्यक्षेत्र संदर्भ
Add workspace context using the brain icon — includes project files and metadata for richer AI understanding.
कंपोनेंट चयन
Select components or blocks from the library using the puzzle icon to include as context.
संदर्भ शामिल करें
अवलोकन
The Include Context button is the first icon on the left sidebar of the chat input area. It allows you to attach project context — such as checked files, selected components, or workspace metadata — to your message before sending it to the AI agent.
उपयोग कैसे करें
बायाँ क्लिक
Opens the context panel where you can browse and select which files and project context to include with your next message.
दायाँ क्लिक
Instantly includes the current context in your message without opening the panel. This is a quick shortcut to attach whatever files and context are currently selected.
प्रोजेक्ट चित्र
अवलोकन
The Project Images panel is a centralized gallery for all images associated with your project. Upload screenshots, mockups, reference images, or any visual assets you want to attach to AI conversations or keep organized within the workspace.
सुविधाएँ
चित्र अपलोड करें
Click the upload area or drag and drop images directly into the panel. You can also paste images from the clipboard using Ctrl+V / Cmd+V.
इमेज ग्रिड
Uploaded images are displayed as a thumbnail grid for easy browsing and selection.
चयन नियंत्रण
Select individual images by clicking, or use Select All / Deselect All to manage bulk selections. Selected images can be deleted with Delete All.
संदेशों से संलग्न करें
Selected images can be included as visual context when sending messages to AI agents, giving them reference material for your requests.
स्क्रीन रिकॉर्डिंग
अवलोकन
The Screen Recordings panel lets you capture screen recordings and configure capture settings. Recorded frames are saved as images that can be attached to AI agent conversations, providing visual context for your requests.
कैप्चर सेटिंग्स
कैप्चर गति
Choose between Slow (2 FPS) and Normal (4 FPS). Use Slow if recording is too fast or you are missing content. Normal captures more detail but uses more storage.
प्रति छवि फ्रेम
Control how many frames are combined per image. Set to 1 for individual screenshots, or higher values for grid compositions that show multiple frames in a single image.
ग्रिड कॉलम
Set the number of columns in the grid layout when combining multiple frames into a single image. Use 1 for vertical stacking or higher values for wide grids.
कैप्चर स्रोत
Select which screen or monitor to capture. Shows available monitors with resolution and position details. The primary monitor is labeled for easy identification.
रिकॉर्डिंग टैब
The Recordings tab displays all previously captured recordings. Browse past sessions, review captured frames, and attach them to new AI conversations for visual reference.
सेटिंग्स
अवलोकन
The Settings panel provides configuration options for the active AI agent. Access it from the gear icon on the chat input sidebar. Settings control permission modes and other agent-specific behavior.
अनुमति मोड
सभी अनुमतियाँ छोड़ें
When enabled, bypasses all permission checks for the agent (equivalent to --dangerously-skip-permissions). This lets the agent execute file edits, terminal commands, and other actions without confirmation prompts.
रीस्टार्ट आवश्यक
Changes to permission settings take effect on the next session. Close and reopen the agent tab to apply the new configuration.
वॉइस इनपुट
अवलोकन
The Voice Input button is the microphone icon at the bottom of the chat input sidebar. It provides platform-native speech-to-text functionality, letting you dictate messages to AI agents instead of typing.

यह कैसे काम करता है
सक्रिय करें
Click the microphone icon to start voice input. The icon shows an active state while listening.
बोलकर लिखाएँ
Speak naturally and your words are transcribed into the chat input field in real time using your system's speech recognition (Windows Speech on Windows, Dictation on macOS).
भेजें
Once done dictating, review the transcribed text and click send or press Enter to submit your message to the agent.
शॉर्टकट
मिडल माउस बटन
On Windows and Mac (if your mouse has a middle button), press the middle mouse button to start recording. Click it again in the chat input area to stop recording and automatically send the message.
कस्टम शॉर्टकी
You can set a custom keyboard shortcut for voice input in the Voice tab within Settings. This lets you start and stop voice recording without using the mouse.